Shimmer drinks. Metallic cupcakes. Pearl-finish macarons. Gold-dusted strawberries. All of that looks easy on social media, but in real kitchens it’s not always that clean. Edible luster dust can clump, sink, taste weird, or just look dull on camera. A lot of that comes down to technique, not talent. If your glitter cocktails aren’t getting that smooth galaxy swirl, or your buttercream looks patchy instead of pearly, you’re probably running into one of these common mistakes. The good news is you can fix all of them with a little control over product choice, ratio, lighting, and storage.
Mistake 1 — Using Non-Food-Grade or “Decorative Only” Dust
Not every sparkly powder in a baking aisle is meant to be eaten. Some jars are labeled “non-toxic,” “for decoration only,” or “craft use.” That does not mean safe to consume. That means “please don’t eat this but we legally can’t call it poisonous.” Putting that kind of glitter directly on buttercream, molded chocolate, fondant flowers, or the rim of a cocktail is how you end up with complaints, weird aftertastes, or in the worst case, regulatory trouble.
What you actually want is fine edible luster dust that is clearly described as food-grade. Food-grade shimmer powders are designed for direct contact with desserts and drinks. They use ingredients intended for consumption, not just surface display. Real edible luster dust is made for things like cupcake toppers, macaron shells, sprayed chocolate spheres, champagne shimmer, and so on.
Before you brush or pour anything, read the label. You’re looking for “edible,” “food-grade,” “intended for food use,” not just “safe” or “non-toxic.” If you’re decorating for sale, not just for home posting, that matters even more. You’re responsible for what’s on that product, and buyers increasingly ask. This is where working with a reliable food-safe glitter supplier matters, especially if you need documentation for export or retail.
Mistake 2 — Adding Luster Dust Directly Into the Liquid
Here’s the classic drink mistake. You dump a scoop of luster dust for drinks directly into a glass of prosecco or lemonade, stir once, and expect a perfect shimmering tornado. Two minutes later it’s all sitting at the bottom of the glass like wet sand, and the drink just looks cloudy.
Luster dust is a suspended sparkle, not a fully dissolving dye. If you just drop it straight in, gravity wins. The right way is to pre-mix. For cocktails and mocktails, bartenders usually build a quick suspension: a pinch of edible luster dust blended first with a neutral clear alcohol, simple syrup, or a glycerin-based food-safe liquid. Then that mix goes into the drink. Now the shimmer spreads evenly and hangs longer instead of sinking.
Same for “glitter champagne” videos you see. Most of those aren’t just tossing powder into the flute. They’re using a controlled shimmer base so the particles stay in motion and light reflects well on camera.
If you’re doing a tasting bar or wedding service, test your ratio before the actual event. Too little and the effect doesn’t show up on camera. Too much and the drink can look muddy instead of iridescent. Keep notes: 1 small pinch per 6–8 oz drink is a good starting point for most fine edible shimmer powders.
Mistake 3 — Overusing or Applying Unevenly on Desserts
Now let’s talk desserts. The number one cause of “why doesn’t my cake look smooth and metallic like the photo” is heavy-handed application. If you cake the dust on too thick, you lose the reflective surface. It stops looking pearly and starts looking chalky, almost like matte paint.
Another issue: streaking or patchy color. That usually comes from brushing dry powder directly on a sticky base like slightly soft buttercream. The powder grips in one spot and refuses to spread.
The fix depends on the surface:
- Fondant or hardened chocolate shells: Use a dry, soft, clean brush and buff a light layer of edible luster dust in circles. Thin and patient beats thick and blotchy.
- Buttercream: Mix a tiny amount of powder with a small splash of alcohol or extract to form an edible “paint,” then apply with a brush in smooth strokes. The liquid helps it glide and dry in place.
- Poured chocolate decorations or molded pieces: Airbrush or spray a diluted mix for even coverage and repeatable finish.
If you’re doing production work for clients, consistency matters more than drama. You want the same rose-gold finish on cupcake #1 and cupcake #200. That comes from measured application, not dumping extra powder “just to be sure.”
Mistake 4 — Ignoring Lighting and Photography
A lot of bakeries and bars think they’re doing something wrong with the product when really the issue is lighting. Shimmer doesn’t just glow by itself. It needs light to bounce and contrast to show. If you take a quick phone pic under cold overhead LEDs, the sparkle goes flat and looks gray. Then you panic and add more powder the next batch, which is the opposite of what you need.
Try this instead:
- Set the glass or dessert near a soft, indirect light source. Window light works. A cheap diffused lamp works.
- Tilt the product slightly so the surface catches that light at an angle.
- For drinks, stir briefly right before shooting to wake up the swirl.
- Avoid busy backgrounds. A neutral surface (white, black, or pale marble) helps the shimmer pop.
This small change gets you that “camera-ready” look that actually sells. It also stops you from wasting stock trying to chase effect by dumping in more powder than needed.
Mistake 5 — Poor Storage and Cross-Contamination
Luster dust is extremely fine. Which means it’s also easy to ruin. Humidity kills the flow. Mixing tools between shades creates murky crossover colors. Leaving jars open near steam or buttercream means clumping and off texture.
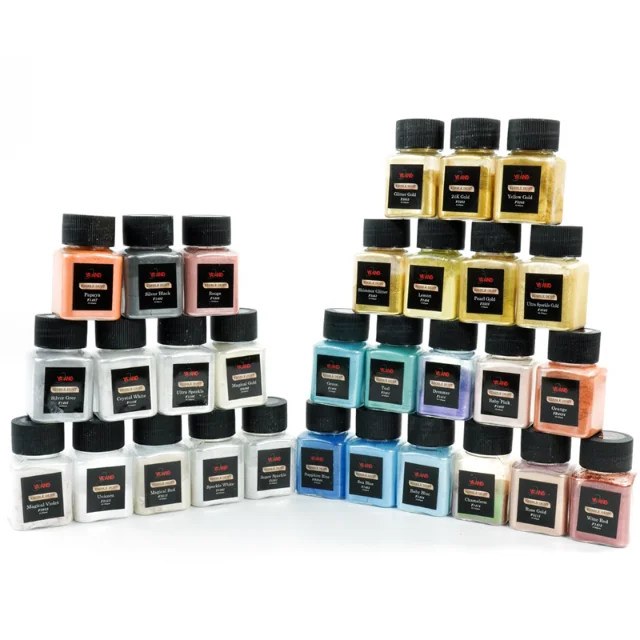
If you’re working with a wide palette, like a 30-color fine edible luster dust set, treat each color like an ingredient, not a toy. Keep lids sealed. Use a clean brush or spoon for each jar. Don’t blow air directly into the jar trying to “puff it up,” because that adds moisture from your breath.
Two reasons this matters:
- Once moisture gets in, those silky micro-particles can ball up. You’ll fight streaks later.
- Cross-contamination kills the metallic purity. Gold plus a tiny bit of red turns weird copper-pink. Not cute when the client asked for “pure champagne gold.”
Good storage also protects you if you’re selling your decorated items. It shows that you treat shimmer as a controlled food additive, not random craft glitter.
Pro Tips for Consistent, Sellable Shine
There are a few habits that separate “nice try” from “this belongs on a menu photo.”
First, always test on the actual base you’ll use. Edible luster dust reacts differently on fondant than on buttercream, and differently in dairy-based drinks than in clear bubbly drinks. A powder that looks pearl-white on white chocolate might flash almost lilac in a gin-based cocktail. Never assume.
Second, write down ratios. Treat shimmer like seasoning. A pinch too much can ruin the mouthfeel of a small dessert bite. A pinch too little and the video won’t catch any reflection.
Third, plan ahead for photo and service. Shimmer in a cocktail glass holds attention for maybe 30–60 seconds after stirring. After that, particles start settling. So if your hook is “sparkling signature cocktail,” you need to serve it right when it’s at peak swirl, and you should be ready to grab the hero shot right then.
Finally, consider sourcing from a supplier that treats sparkle like part of your brand look, not just something you dust on at the end. If you need a consistent metallic rose across 200 macarons and 50 champagne flutes for a corporate event, you don’t want to fight with mystery powder that changes tone jar to jar.
Why Supplier Quality Decides Your Final Look
This is where a professional-grade palette helps. A large format, multi-shade kit lets you match tone to theme instead of forcing every job to be “gold or silver.” When you have access to champagne gold, antique gold, pale blush pearl, rose quartz pink, deep bronze, and iced violet, you stop improvising and start color-directing.
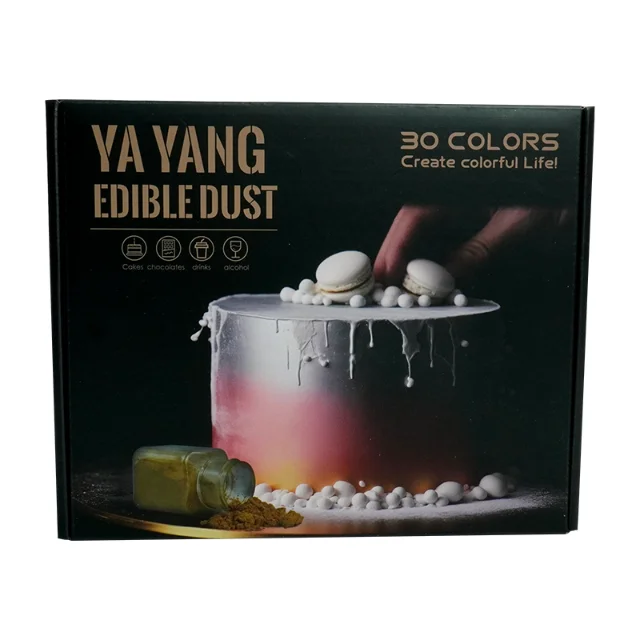
YAYANG works in that space. The company focuses on supplying food-grade decorative powders and color systems for desserts, drinks, and event service. Its fine edible luster dust collection covers over 30 curated colors designed for smooth application, camera-friendly reflection, and stable appearance in both dry toppings and liquid suspensions. YAYANG also supports OEM / ODM customization for global clients, which matters if you sell finished decorated items or pre-packed drink shimmer kits into different regions with different labeling rules. The idea is simple: you get consistent sparkle that’s made for food, plus documentation you can stand behind in front of a buyer or importer.
FAQ
Q1: Is edible luster dust actually safe to eat?
A: Real edible luster dust is made for direct food contact and should be labeled food-grade. “Non-toxic” or “for decoration only” is not the same thing. If you’re putting it on desserts or in drinks, use food-grade only.
Q2: How much luster dust should go in one drink?
A: Start tiny. A pinch (think 1/16 teaspoon or less) per 6–8 oz usually gives a clean shimmer. Too much looks cloudy and can settle fast.
Q3: Why does my shimmer sink to the bottom of the glass?
A: It wasn’t suspended. Pre-mix the powder with a little clear alcohol or simple syrup, then pour that into the drink. That keeps the particles floating and helps the camera catch the swirl.
Q4: Can I mix colors to make custom shades?
A: Yes, but keep tools clean. Use separate spoons or brushes so you don’t contaminate full jars. Once two colors get mixed in the container, you can’t get the originals back.
Q5: How should I store my luster dust set?
A: Cool, dry, sealed. Keep each shade capped tight, protect it from steam and humidity, and label each jar. Good storage keeps texture smooth and keeps metallic tones pure across batches.