
Why Does Shimmer Liqueur Settle in the Bottle?
A shimmer liqueur can look perfect when it leaves your filling line and still develop a dull layer at the bottom after several weeks. The problem usually comes from particle size, density difference, alcohol content, temperature swings, and bottle movement. Packaging affects the result too. A narrow bottle may make settled pigment difficult to resuspend, while a wide shoulder can leave visible rings after repeated handling.
A good shelf-stable product keeps the pearlescent material evenly dispersed long enough for normal retail storage. It does not need to remain perfectly uniform forever. It needs predictable movement, easy resuspension, and a clean appearance when the customer picks it up.
How Particle Size Controls Settling
Settling speed rises sharply as particle size increases. Stokes’ law gives a useful starting point: larger particles and a greater density difference between pigment and liquid produce faster downward movement.
For Beverage luster dust, particle distribution matters more than a single average number. Fine particles create a soft glow but may clump if the surface treatment is poor. Coarser particles create stronger flashes but usually settle faster. Ask for a controlled particle-size range and test it in your exact alcohol and sugar system.
Why Alcohol and Sugar Change the Result
Alcohol lowers viscosity compared with a heavy syrup base. Lower viscosity means less resistance against particle movement. Sugar, glycerin, and some flavor concentrates can raise viscosity, but they may also change density or create haze.
You should measure viscosity at several temperatures, not only at room temperature. A bottle stored in a warm warehouse can behave very differently from one kept at 20°C. Even a modest temperature cycle may reveal separation that a short bench test misses.
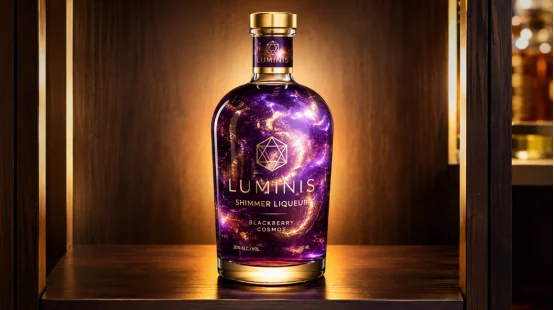
How Can You Improve Luster Dust Suspension?
The practical answer combines pigment selection, dosage, mixing energy, and liquid design. Changing only the dust often leaves the real cause untouched. Begin with a small pilot batch and compare three or four dosage levels. Too much pigment can increase visible sediment, produce a heavy metallic look, and make the drink harder to filter.
Select Beverage-Grade Pearlescent Pigment
Use an edible pearlescent pigment designed for beverages, with documented purity and food-contact compliance for your target markets. Cosmetic glitter is not an acceptable substitute. Beverage-grade mica systems are commonly selected because they create a floating shimmer when the liquid moves, but grade and coating still affect suspension.
Your supplier should provide a technical data sheet covering recommended use level, particle size, color stability, and dispersibility. The information should match the actual lot shipped to you. Small differences between lots can become obvious in a clear bottle.
Build a Controlled Premix
Do not tip dry Beverage luster dust directly into the finished tank. That approach often creates wet clumps and pigment “eyes” that settle quickly.
Instead, make a premix with a compatible portion of the base liquid. Add the powder slowly under moderate shear, then allow the premix to wet out before combining it with the main batch. Keep the temperature within the range recommended for your flavors and alcohol system. Excessive shear can introduce air, which creates a temporary cloudy appearance and complicates filling.
Use Stabilizers Carefully
A small amount of a beverage-compatible thickener may slow settling, but the wrong stabilizer can create stringiness, haze, or an unpleasant mouthfeel. Xanthan gum, gum arabic, cellulose derivatives, or modified starches may work in some formulas, yet alcohol tolerance and pH response vary widely.
Run a side-by-side test with your final flavor, acid, sugar, and alcohol levels. Check pour behavior as well as suspension. A product that stays suspended but pours like syrup will not feel right to consumers.
Which Packaging Details Affect Shelf Stability?
The bottle is part of the formulation system. Clear glass shows shimmer well, but it also exposes sediment, color drift, and light sensitivity. A slightly tapered body can make resuspension easier because the liquid reaches a stronger flow pattern during inversion.
Choose a Bottle That Supports Resuspension
Test the actual bottle, closure, and fill volume together. A tall, narrow bottle may need more vigorous rotation to lift settled pigment. A wider bottle usually creates better circulation but may show a larger sediment footprint.
Leave enough headspace for safe movement without creating excessive foam. Confirm that the closure liner does not shed particles or react with alcohol. Retail cartons should also tolerate vibration during transport, since repeated jolts can create bands of pigment on the bottle wall.
Add Handling Guidance Without Making It Look Like a Warning
A short instruction such as “Gently rotate before serving” can protect the visual effect. Place it where consumers can see it without covering the product story. Your sales team should also tell distributors to avoid storing shimmer liqueurs for long periods in hot loading areas.
How Should You Test a Shimmer Liqueur Before Launch?
Short stability tests are useful for screening, but retail products need a broader protocol. Record the formula, pigment lot, dosage, mixing sequence, viscosity, pH, alcohol level, and filling temperature for every trial.
Run Realistic Temperature and Position Tests
Store filled bottles upright and on their sides at room temperature, refrigerated conditions, and an elevated temperature that represents warehouse exposure. Inspect them weekly for sediment height, rings, color change, haze, and ease of resuspension.
A simple inversion test helps: rotate the bottle the same number of times, then record how long the shimmer takes to distribute. Photograph each bottle under identical lighting. Consumers notice uneven shimmer immediately, especially in clear packaging.
Check Filtration and Filling Equipment
Filters, pumps, and narrow transfer lines can remove or damage pearlescent particles. Verify that your process does not strip the visual effect before bottling. A sample taken from the tank may look excellent while the first and last bottles from the filler look different.
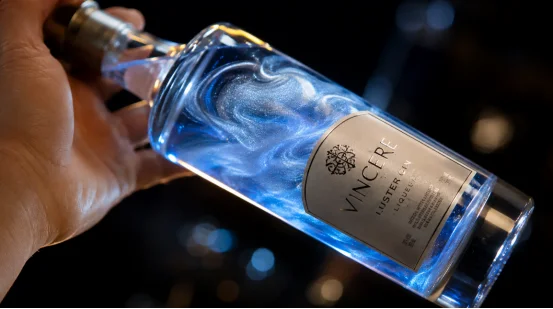
Why Technical Supplier Support Matters
A stable shimmer product requires more than a catalog color. You need a supplier that can discuss particle behavior, premix methods, dosage trials, and documentation in the context of your beverage.
YAYANG supplies edible luster dust for food and beverage applications and presents product information for manufacturers selecting food-safe pearlescent effects. Its value is most relevant when you need repeatable color, batch consistency, and technical communication during trials. You can review the available edible luster dust range and contact the company through its official manufacturing site for application details. The right technical exchange should cover your alcohol percentage, pH, viscosity, bottle shape, target market, and shelf-life conditions before a final grade is chosen.
FAQ
Q1: How much Beverage luster dust should you add to a shimmer liqueur?
A: Start with several low-dose trials based on the supplier’s technical sheet. The best level depends on particle size, color strength, alcohol content, and the visual effect you want.
Q2: Can ordinary edible glitter replace Beverage luster dust?
A: No. Use a beverage-grade pearlescent pigment with suitable purity, dispersibility, and regulatory documentation. Decorative glitter may settle quickly or fail food-safety requirements.
Q3: Does higher viscosity always prevent settling?
A: No. Higher viscosity can slow movement, but an unsuitable thickener may create haze, stringiness, or poor pouring. Test the complete formula.
Q4: Should customers shake a shimmer liqueur before serving?
A: Gentle rotation is usually better than hard shaking. It redistributes the pigment while reducing foam and pressure inside the bottle.
Q5: What shelf-life tests are most useful?
A: Combine temperature cycling, upright and sideways storage, visual inspection, inversion timing, and checks after filling and transport simulation. These tests reveal problems that a single room-temperature sample can hide.
15:40