
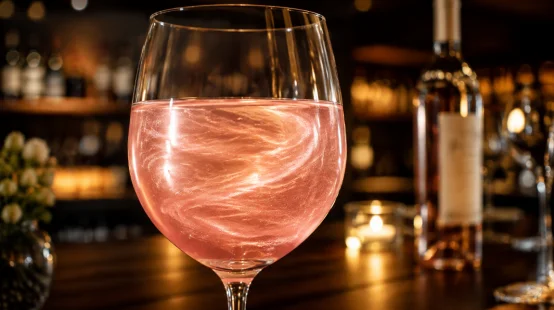
A glass of glitter wine needs to catch the light nicely. It should never show floating lumps. It also shouldn’t have a cloudy film. This difference matters a lot for wineries, tasting rooms, hotels, and event bars. Guests always look at their glass before they even taste the wine. The drink feels truly special when the shimmer spreads out evenly. Sometimes, glitter gathers right at the bottom. Other times, it sticks to the rim. When that happens, the whole effect looks bad and rushed.
The main trick is picking the right edible glitter for wine. You also need to use a very simple prep method. Things like particle size and how much you use matter. Mixing order changes the final look, too.
Why Does Glitter Clump in Wine?
Cheap glitter often uses pieces that are way too big. They can also be too heavy for drinks. Wine holds alcohol, acids, and sweet sugars. It has natural compounds, too. All these things change how the shiny powder moves around inside the glass.
Check the powder itself before you change how you serve drinks. A product might look totally fine when it is dry. But it can act completely different once it touches chilled wine.
Particle Size Changes the Whole Pour
Large pieces fall to the bottom fast. They might make a bright flash for just a few seconds. After that, they just sit at the bottom. Some powders also stick right to the glass wall. This happens because their outer layer does not mix well in water or wine.
Ultra-fine micron luster dust acts in a different way. Tiny particles stay floating for a much longer time. They make a softer, very even glow. You still have to swirl the glass gently. However, the wine glitter will not form ugly, visible clumps as easily.
Moisture and Storage Matter
Wet air can turn loose powder into hard little balls. This happens before it even reaches the bottle. Always keep your edible luster dust closed up tight in a dry spot. Make sure to use a clean, dry spoon. Even a tiny bit of water inside the jar ruins the texture.
Never scoop glitter right over an open bottle on a busy night. Steam, water drops, and splashing wine can easily jump back into your jar.
How Can You Prevent Glitter Clumps in Wine?
A good method starts with a tiny test pour. First, add a small pinch of edible glitter for wine to two or three ounces of wine. Next, just watch it for one full minute. This fast check shows exactly how the powder acts. Do this before you make a huge batch.
Temperature plays a big part, too. Very cold wine slows down the mixing. Warm wine might let the good smells go away too fast. Chilled wine gives the very best balance. Just make sure it isn’t icy cold.
Add the Dust in Small Doses
Start with just a pinch. You can change it if you need to. A tiny, measured amount usually makes enough shimmer for a normal 750 ml bottle. Adding more powder does not always mean a better look. Too much glitter can make the drink look thick and chunky. It also leaves extra junk stuck on the glass.
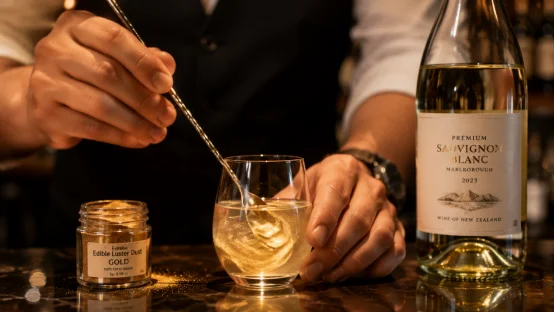
First, drop the powder into a very small cup of wine. Stir or swirl it gently. Wait until the luster melts into the liquid. After that, pour that mix into the big bottle. Slowly turn the bottle around. Do not shake it hard. Heavy shaking builds up bad pressure in sparkling wine.
Mix Before Each Pour
Wine glitter naturally sinks down over time. You must keep the bottle moving in a slow circle before you pour each glass. A long bar spoon helps a lot with flat, still wine. But, stirring too hard will kill the bubbles.
For sparkling wine, pour the plain wine first. Then, pour a little bit of pre-mixed luster down the side of the glass. This simple trick keeps the bubbles happy. It also stops dry powder from floating on top.
How Do You Avoid Residue on the Glass?
Leftover dust usually comes from pieces that are way too big. It also happens when you use too much product or if it mixes poorly. This mess looks like a dirty ring right around the top line of the drink. It can also look like tiny dots stuck inside the glass bowl.
Cleaning your glasses properly helps a lot. Wash and rinse them very well. Then, dry them completely so no towel lint or soap is left behind. A super clean glass gives the powder nothing to grab onto.
Choose a Residue-Free Wine Glitter Formula
Try to find food-grade glitter made just for drinks. Good edible luster dust should melt nicely into the liquid. It should never form hard, crunchy flakes. Tiny particles make a much cleaner look. They also stop the drink from feeling like sand in your mouth.
Test your powder in white wine, rosé, red wine, and mixed drinks. Each type of drink has a different thickness and color. A mix that looks totally perfect in clear wine might need a much smaller amount in a dark drink.
Keep the Rim Clean
Never put loose glitter on the rim of the glass. Only do this if the product is made exactly for rimming. Powder on the rim gets all over people’s lips. This makes a very messy look.
If a guest asks for extra sparkle, just put a little bit of edible luster dust inside the drink. Do not put it around the top edge. The drink looks much nicer this way. The sparkle is also way easier to control.
What Makes Premium Edible Luster Dust Different?
Premium edible luster dust is built to look the same every single time. The powder needs to have a fine, even size. It needs a color that won’t fade. It also must act the exact same way in liquid every time. These small details matter a lot when you serve hundreds of glasses at a big party.
A good seller will give you clear rules on how to use it. They will share food-safety papers and offer smart packaging for big batches. That info helps you set a serving rule you can copy easily. You won’t have to guess how much to use for every glass.
Why YAYANG Luster Dust Fits High-Volume Wine Service
Once you know how to serve it right, picking the powder is your next step. YAYANG supplies edible luster dust for food and beverage needs. They offer big bulk sizes for pro users. Their items focus purely on very fine powders. These are meant to spread through a ready drink and give a bright, smooth shine.
The ultra-fine micron size helps the powder mix much better. This easily cuts down on ugly clumps and heavy sinking. For wineries and hotel bars, dust that acts the same way every time makes testing super simple. You can start with a tiny dose and write down what happens. Then, you just do the same thing all night.
You can look at their edible luster dust choices when checking out colors and bag sizes. If you need to buy a whole lot, the YAYANG website gives you a direct way to ask questions about products and shipping.
A Simple Service Routine for Glitter Wine
Make a small test cup before a big party starts. Use the exact same wine, coldness, glass shape, and dust amount you plan to serve. Look at the drink after one minute. Check it again at five minutes and ten minutes.
If the glitter falls down too fast, you need smaller pieces or a better pre-mix trick. If a weird film shows up, use less dust next time. Also, check how the glasses are washed. Write down what works best. A tiny note taped behind the bar saves hours of guessing later on.
For a really nice look, use clear glass cups. Set up good lighting, and give the cup a soft swirl right before you hand it over. Sometimes, a quiet detail works best. Guests should see the pretty glow first. Then, they will figure out why the wine looks so cool.
FAQ
Q1: What is the best edible glitter for wine?
A: Pick food-grade edible luster dust. It must have an ultra-fine micron size so it mixes into drinks well. It should add shimmer but never feel like sand or leave a messy ring.
Q2: How do you prevent glitter clumps in wine?
A: Test a tiny bit first. Mix the dust with just a little wine in a small cup. Pour it in slowly. After that, swirl the main bottle very gently before you serve it.
Q3: Can edible luster dust be used in sparkling wine?
A: Yes, it can. Just use a tiny bit and never shake the bottle hard. Mixing it first helps the powder spread nicely. It also keeps the fun bubbles safe.
Q4: Why does wine glitter stick to the glass?
A: Pieces that are too big cause this. Using too much powder, wet air, or leftover soap will also make the glitter stick fast to the glass walls.
Q5: How much edible glitter for wine should you use?
A: Start with just a tiny pinch for each bottle. See how it looks. You can add a bit more later. The best amount changes based on the wine type, cup size, and color.